


Glitch Photoshop Effect Free Download

A “photo glitch effect” is a term we use to describe the intentional modification, manipulation, or distortion of a digital image with the goal of creating visual anomalies and artifacts, such as the ones that could occur due to errors in data transmission, software bugs, or the malfunction of hardware.
If these artifacts and visual anomalies were to occur “naturally,” or better said, unintentionally, we would be looking for ways to remove them. But, as previously mentioned, sometimes the image structure could benefit from intentionally adding such “imperfections” to make it more exciting and interesting to look at.
Such photo glitch effects are often used in digital art, graphic design, and photography to add an element of unpredictability, surrealism, or retro-futurism to images.
There are multiple ways to create a glitch effect in photo-editing software such as Adobe Photoshop.
Here are some of them:
-
Pixel Sorting
Rearranging or distorting pixels in an image to create abstract patterns or shapes. The process typically involves sorting pixels based on certain criteria, such as their color values, brightness, or position, which leads to the creation of distinct patterns, shapes, or textures within the image.
-
Data Bending
Manipulating the raw data of an image file using software tools or text editors to introduce visual distortions. Once the image file is opened, users can edit the raw data directly by adding, removing, or modifying sections of the code. This manipulation can be done in various ways, such as rearranging bytes, changing numerical values, or inserting random characters.
-
Color Channel Manipulation
Separating and manipulating the individual color channels (red, green, and blue) of an image to create color shifts or distortions.
-
Overlaying Digital Noise or Artifacts
Overlaying digital noise or artifacts involves adding simulated imperfections or distortions to an image to create a specific visual effect. These imperfections can mimic the appearance of analog media degradation or the artifacts commonly associated with digital compression or transmission errors.
- Filters and Presets
More often than not, due to the knowledge and experience needed to manually make such changes to the image, developers come up with complete presets that you can apply to your image to get the whole glitch effect immediately. This makes the whole process a lot easier for users with beginner-level photo editing knowledge.
Some creators of such glitch-effect apps and filters will also allow for modification of some of the parameters included so that users can customize the look of the anomalies and artifacts to some extent.
However, to have the most freedom and customizability while working on images or making glitch art, it’s best that you learn how to create the glitches yourself, and that’s exactly what we’ll help you learn in the section below.
- Filters and Presets

How to Make a Glitch Effect in Photoshop
There are multiple approaches to creating a Photoshop glitch effect. We cannot say which is the best one as every creator will prefer one method over another, but we’ll show you how to easily and effectively accomplish this task without needing expert-level knowledge of the software.
Here’s what you need to do:
-
Load Up Photoshop and Create a New Project
Once you launch Photoshop on your computer, wait for it to fully load and then create a new project. We recommend creating a new project over working on an already existing one so that you don’t make any unwanted changes to it.
To create a new project, click on the “New file” button as shown in the image below, then choose your format and preferred settings and click on the “Create” button.
Import Your Image and Duplicate the Layer
The next step is to import your image within Photoshop to the new project you just created. To do this, click on “File” -> “Open” as shown in the image below.
Once you import the image, you will see it in the “Layers” panel. The next step is important and should be a habit whenever you’re working in Photoshop, and it is to use the Duplicate Layer feature every time you need to make a new change to the image.
So, right-click your image and choose “Duplicate Layer” as shown in the image below.
Now you can apply effects and make various changes to the image without altering the original.
Convert Your Image into a Smart Object
Once again, right-click the duplicated layer (not the original), and choose “Convert to Smart Object”. This will allow you to apply filters and effects non-destructively, meaning you can adjust or remove them later if needed.
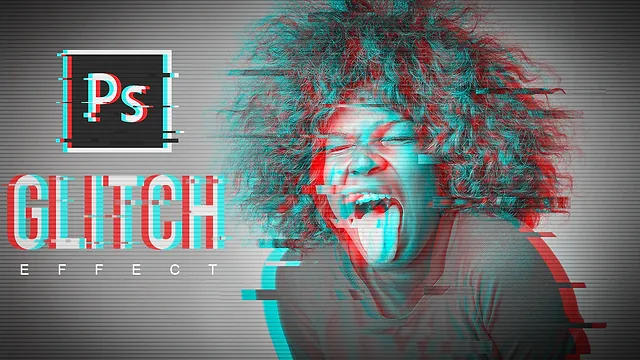
Apply the RGB Channel Split Effect
Once again, go to “Filter” -> “Distort” but this time, choose the “RGB Channels Split” option.
Doing this will separate the color channels red, green, and blue. In the channels panel, adjust the settings to your liking.
If you are using an older version of Photoshop that doesn’t have the RGB Channels Split effect, here’s what to do:
Create three duplicates of the background layer within the layers panel. Once again, we’re not making any changes to the original background layer.
Name one of the three duplicates “red”, name another one “green”, and name the last one “blue”.
Now, right-click the “red” layer and choose “Blending Options”.
Under “Advanced Blending” deselect the “G” and “B” which stands for Green channel and Blue channel. This will only leave the Red channel active on that layer.


