BAO Bones v1.5.10 Free Download
The fastest, easiest way to setup and animate an IK rig in After Effects!
Setting bones for an inverse kinematic chain has never been easier.
Testimonials
Just wanted you guys and everyone else who reads this to know this is one of the best, easiest and fastest tool to use for IK… You can set up IK for a single appendage in seconds. Because it’s a plug-in, it’s pretty much self-contain, meaning is doesn’t have all the other supporting IK elements in your timeline like other tools do. This tool has saved probably 20-30 hours of time on a current IK project (and I’ve only had the tool for a month! )Can’t speak more highly of Bao Bones!!!– Frank Lamont
I love the fact that, although I am working with a PNG and not a vector, I can see no distortion or blurring on the body parts as I move them, which is amazing! I’ll keep playing with your plugin for a few days and it’s most likely that this will be my Christmas present for this year.
I tried Duik and found it to be more complicated to work with than this one and also own Rubber Hose but it doesn’t give me the same degree of flexibility Bones does (just in case others are wondering why your plugin is better). The movement flows so natural with very little effort!Anyway, thank you for your fast support and for this awesome plugin!– Mia Mateescu
I’d like to mention how incredibly impressive Bones is. I’ve been using DUIK for awhile now, but this is so much better for the kind of rigging that I do!– David Arbor
How is it different from other rigging tools?
1. Distortion
Duik and other IK rigging tools rely on After Effect’s built-in ‘Puppet tool’ for distortions. The main issue with this is that the mesh from the Puppet Tools is automatic, which means you cannot define it, and of course, cannot change it over time. With Bones, the mesh is defined to fit joint bending, and you can modify it whenever you want. You can even use masks to get very accurate distortions.
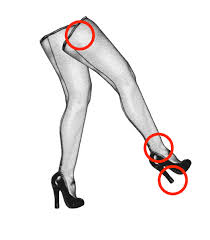
2. Bones does not require straight arms or legs to rig
With Bones, you avoid the hard work preparing and unbending your layers in Photoshop.
3. An entirely keyframable workflow
This is the main reason Bones was created. With Bones, you can switch the IK mode from Automatic to Manual whenever you want, you can even keyframe Parenting and Selection points. This means the subtleties of your animation never need to be compromised.
4. Simplicity
Bones was created for an animation feature film, which required the animation of A LOT of characters. Bones makes it super easy to setup and manage many different characters.
5. Less layers
With Bones, you can control a whole character on a single layer without needing any extra nulls or controllers. This keeps compositions tidy and light.
6. Speed
Bones is a native plugin and does not rely on expressions, so it is really fast. Oh, and it is also GPU accelerated, so it is really, really fast!
New Features
New in version 1.5: New module “Bones_overlaps_manager”: Allows defining and animating a ‘Z’ value at start and end of each mesh, just like ‘Puppet Tool’ overlaps.
New in version 1.3: You can add a child to any bone.
New in version 1.4: Scale any part of your IK chain.
Watch tutorial videos on both of these features in the Tutorials section below.
Smooth skinning
Bones gives you the option to use masks to define the distortion mesh to get ultra-smooth skinning without any artifacts.
Pupeteer – Control your entire character on one layer
Pupeteer allows you to control many instances of Bones from one layer.