Rapid Reel Composer v1.0 Free Download

Introducing Rapid Reel Composer, a powerful After Effects tool designed to simplify your video editing process and enable you to effortlessly create social media reels and short videos in just a few clicks. This tool eliminates the need for manually trimming and splitting lengthy footage. To split your video into shorter clips, all you need to do is place markers by pressing the asterisk (*) key on your keyboard at the desired sections of your footage. Rapid Reel Composer will automatically split the selected layer into multiple short clips at the marker locations. You have two methods to choose from: the In-Out method and the ‘Lazy’ method. Rapid Reel Composer is loaded with various other convenient features that will save you time and streamline your workflow, reducing the need for repetitive tasks.
Key Features:
• Trim footage based on markers.
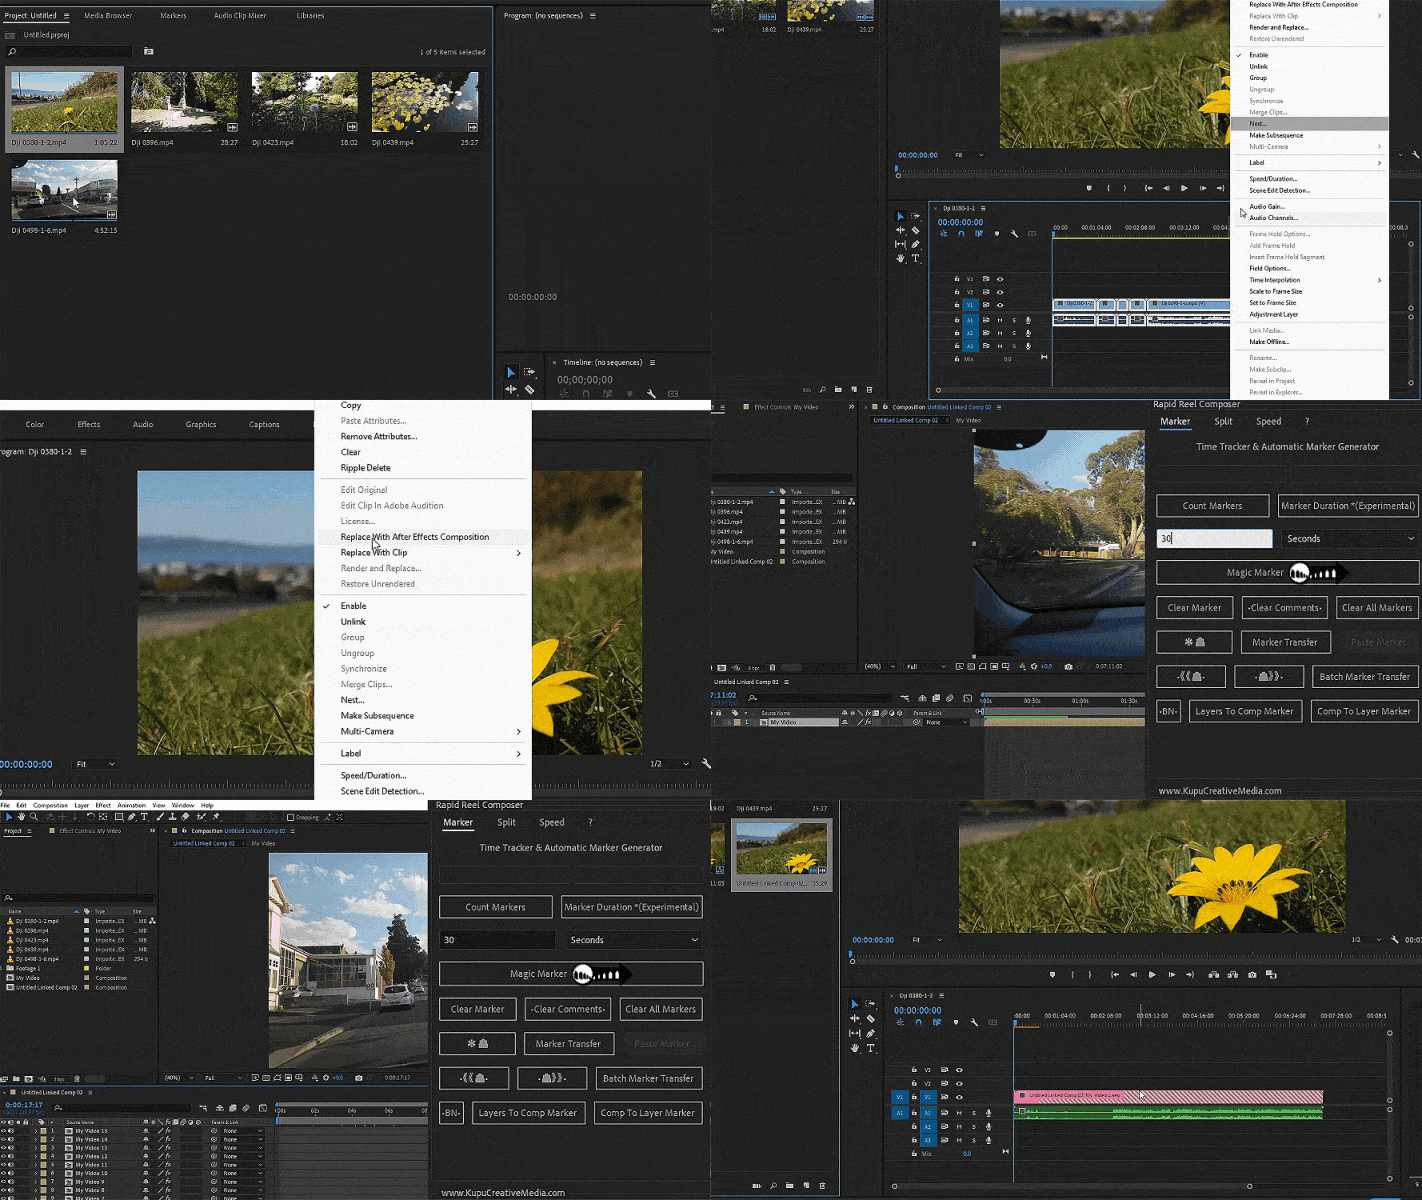
• Premiere Pro workflow supported: Nest all clips, replace nested footage with After Effects project, use it in After Effects without leaving Premiere Pro.
• In-Out: Trim footage to the desired length based on In & Out points.
• Lazy: Automatically trim footage to the desired length starting from the In point.
• Magic Marker: Automatically place markers at the desired intervals.
• Sequence: Easily stagger or overlap layers with a single click.
• Batch Marker Transfer: Copy all selected layers’ markers in a null.
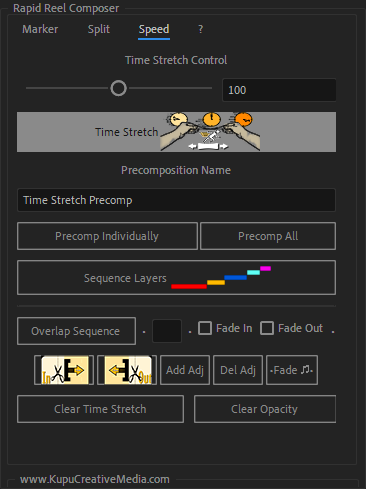
• Speed: Time-stretch layers with a single click to speed up footage.
• Marker Transfer: Copy markers from a single layer, and paste into multiple layers.
• Layers to Comp Marker: Copy multiple layers markers, send as Comp marker.
• Comp to Layers Marker: Copy comp area markers, and send to multiple layers.
• Clear marker comments and/or markers
• Detect marker’s In & Out duration, make comment stats (experimental feature)
• Shift Markers: Shift markers forward or backward by 1 or 10 frames.
• Laptop Markers: Conveniently add markers if you don’t have an asterisk (*) key.
• BN: Set the work area with a single click for selected layers..
• Precomp: Precompose individually or for all selected layers within one comp.
• Fade In and Fade Out overlapped layers, including audio.
• Adjust or change audio volume with a single click.
• Add adjustment layers of the same length as the selected layers.
• Utilize handy buttons to trim layers.
Features at a Glance:
Rapid Reel Composer operates seamlessly with markers. Editing your footage is a breeze – simply place markers on the layers you wish to edit. You have the flexibility to set markers individually on each clip or consolidate all clips into one composition and set markers there. Before setting markers, you have two options:
Precision Mode: For fine-tuned clip trimming, set both In and Out point markers manually.
Lazy Mode: If you’re short on time, let Rapid Reel Composer automatically place markers for you.”
• BN: Set the work area with a single click for selected layers..
• Precomp: Precompose individually or for all selected layers within one comp.
• Fade In and Fade Out overlapped layers, including audio.
• Adjust or change audio volume with a single click.
• Add adjustment layers of the same length as the selected layers.
• Utilize handy buttons to trim layers.
Sequence Layers
Start by importing all your footage and bringing it into the composition. To sequence or stagger the layers one after another, click the ‘Sequence’ button. Make sure to select the layers from the bottom to the top, as this is the standard editing order in After Effects.
Precompose All Footage
You have two options for organizing your clips. You can set markers by pressing the asterisk (*) key on individual clips, or for a cleaner approach, you can select all layers and precompose them (similar to Nesting in Premiere Pro). To do this, select all the layers from bottom to top, and then press the ‘Precompose All’ button. This action will transfer all the selected layers into a new precomposition.
Magic Marker
You have the option to manually set In and Out point markers, or for a more hands-off approach, use the ‘Magic Marker’ button to create markers automatically. Start by selecting the desired layers or composition. Next, set the work area by pressing the ‘B’ and ‘N’ keys, or simply click the ‘BN’ button for convenience. Then, input your preferred marker duration and press the ‘Magic Marker’ button to generate markers automatically on the selected layers.Lazy Method
The ‘Lazy Method’ requires only the In point marker. It automatically splits the footage from each marker to your specified duration. This method is ideal for creating tutorials, speed art, travel videos, cooking videos, and more. Simply identify the areas you want to share with your audience for a few seconds and place a marker on each crucial point in your clip. If your input value is, say, 3 seconds, the ‘Lazy Method’ will create 3-second splits from each marker, making your editing process efficient and straightforward.BN: Set Comp Work Area
After you’ve created your splits, select all of them and establish the composition’s work area by pressing ‘B’ and ‘N’ on your keyboard. Alternatively, you can simply click the ‘BN’ button to set the work area. Once this is done, you’re ready to render your video if you don’t require any further editing. If you need to refine your editing further, you can refer to the tutorial to discover how to utilize the other included tools. For instance, you can use the ‘Time Stretch’ button to slightly adjust the speed of your footage or the ‘Overlapped Sequence’ button to create smooth fade-ins and fade-outs between selected clips, among other options.
In – Out Method
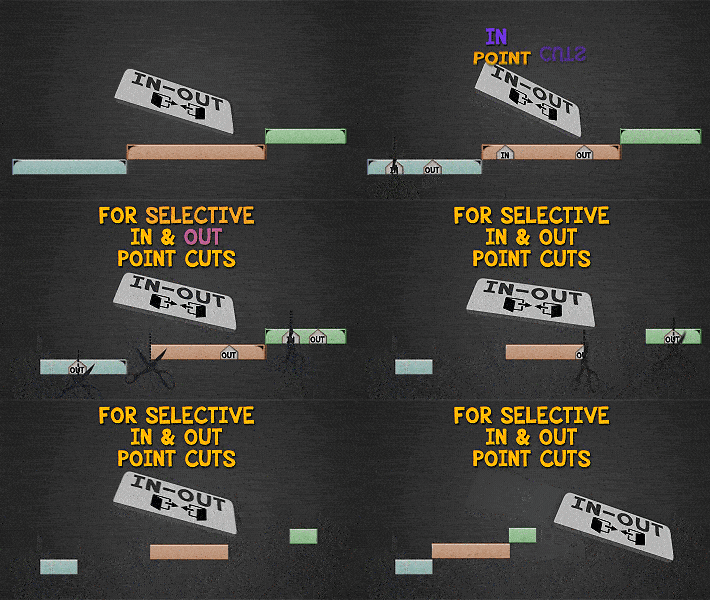
If you have specific In and Out points in mind, place markers on your desired layers. In this method, odd-numbered markers represent In points, and even-numbered markers represent Out points. For instance, marker 1 designates the In point of your first cut, marker 2 signifies the Out point of that cut, and so on. This method is particularly useful for family videos, travel vlogs, and other content where you need to be highly selective and precise about the footage you want to present to your audience.
Time Stretch
To prevent your video from feeling monotonous, consider adjusting its speed. For example, when creating speed art, travel videos, or cooking content, you may want to change the pace of your footage. The ‘Time Stretch’ button makes it easy to modify the speed of multiple layers. A setting of 100 represents the regular speed. To speed up your video, select a value below 100. If you prefer to slow it down, choose a value greater than 100. You can use the slider or input your desired value in the provided box for flexibility.
Handy Marker Button
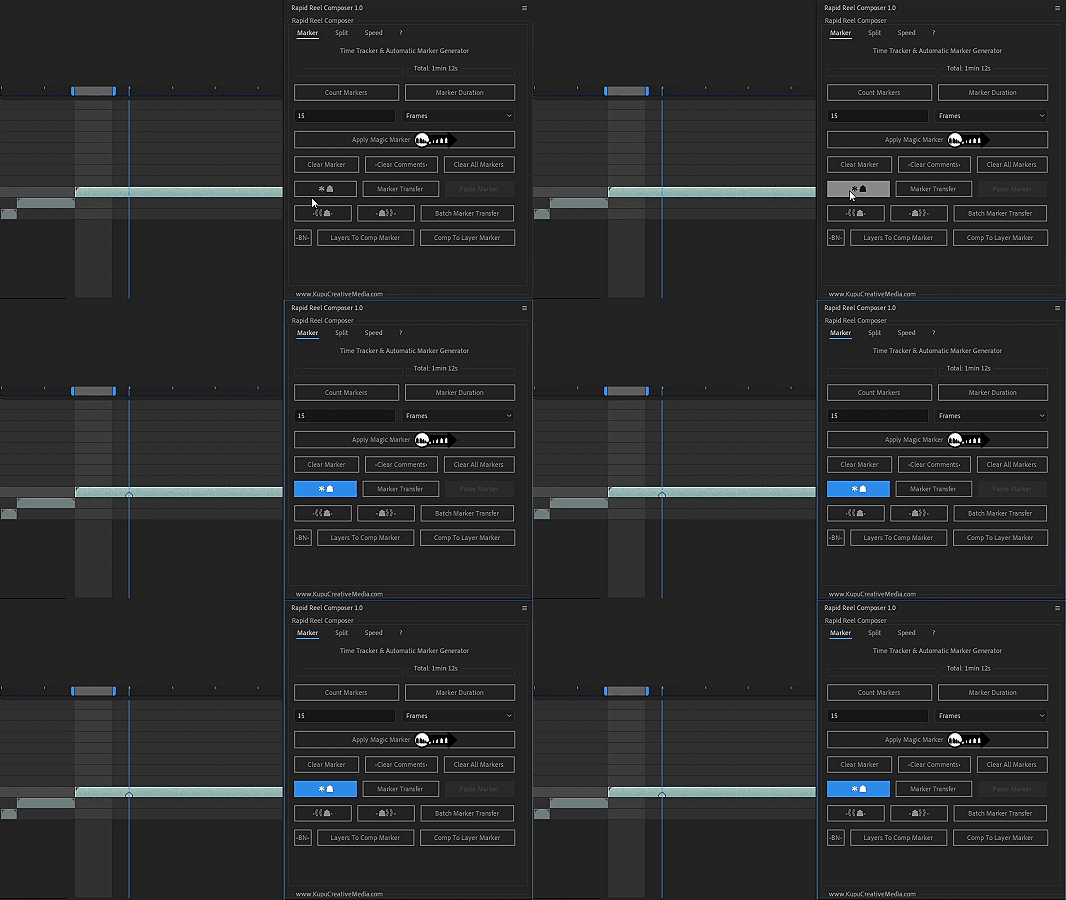
If you’re working on a laptop or using a keyboard without a numpad, this convenient button can save you time. Simply select one or multiple layers and click to add a marker at the current position. If you wish to create automatic markers, use the ‘Magic Marker’ button.
Batch Marker Transfer
If you have numerous layers with markers and need to transfer them efficiently, use the ‘Batch Marker Transfer’ button. Simply select all the layers and click the button. It will generate a null object and copy all the markers onto it. Later, you can easily transfer these markers from the null object to the composition area or other layers using the ‘Layers To Comp Marker’ button or the ‘Comp to Layers Marker’ button.
Layers To Comp Marker
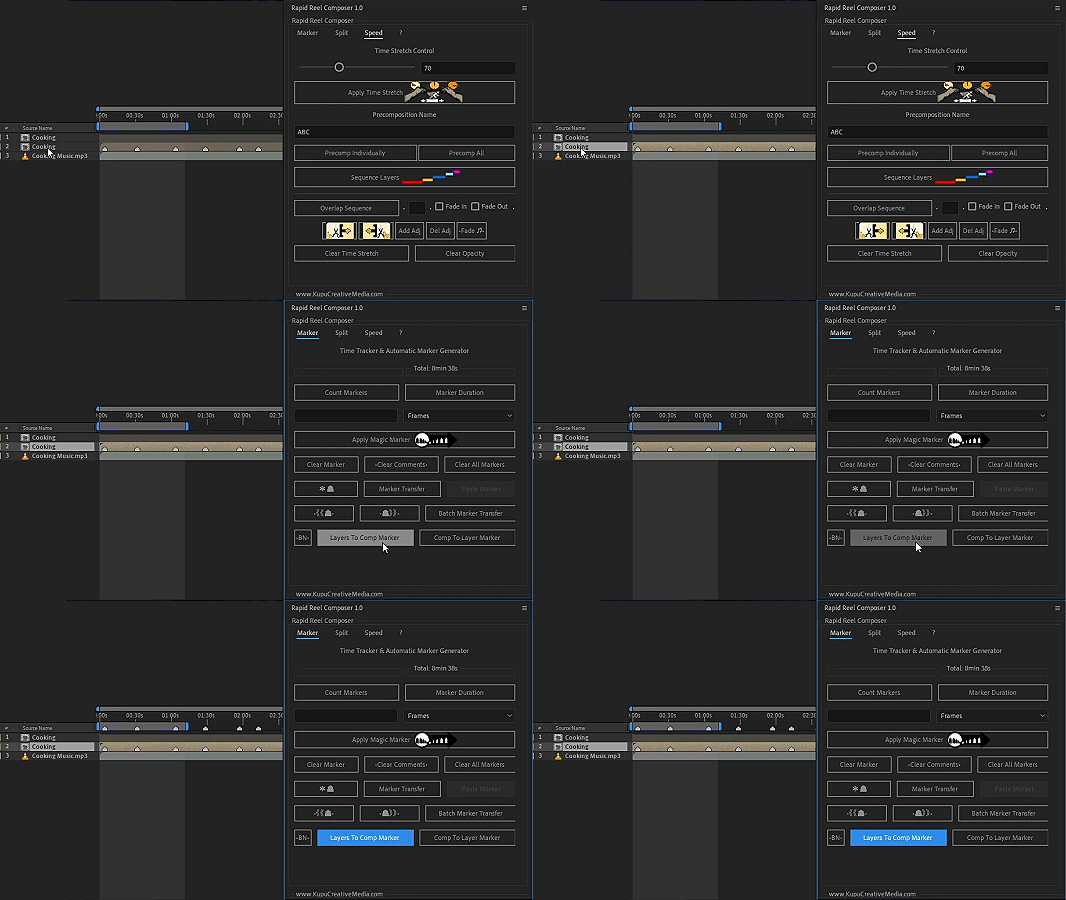
With the ‘Layers To Comp Marker’ feature, you can select multiple layers and swiftly copy their markers to the composition area in a single click. These markers can then be transferred back to multiple layers by using the ‘Comp To Layers Marker’ button. This simplifies the process of managing and moving markers within your project.
Comp To Layers Marker
With the ‘Comp To Layers Marker’ feature, you can efficiently transfer your composition markers to multiple layers in a single click. This proves to be especially useful when you need to move markers from one composition to another, streamlining the process.Premiere Pro Workflow
Rapid Reel Composer enhances video editing by integrating with Adobe Premiere Pro and After Effects. While it doesn’t load directly into Premiere Pro, it complements a live-action workflow. Import your footage into Premiere Pro. Create sequences from your clips by selecting them, right-clicking, and choosing “New Sequence From Clip.” Group all your footage by selecting them in the timeline, right-clicking, and choosing “Nest.” Rename your nested composition as needed and select it. Right-click on the nested composition and select “Replace With After Effects Composition.” After Effects will open, and you’ll be prompted to save the After Effects (.aep) file. In After Effects, add markers by pressing the asterisk key (*) and use Rapid Reel Composer for your editing needs. Save the .aep file when your editing is complete in After Effects. Your Premiere Pro project will automatically update, allowing you to return to Premiere Pro for further edits.
